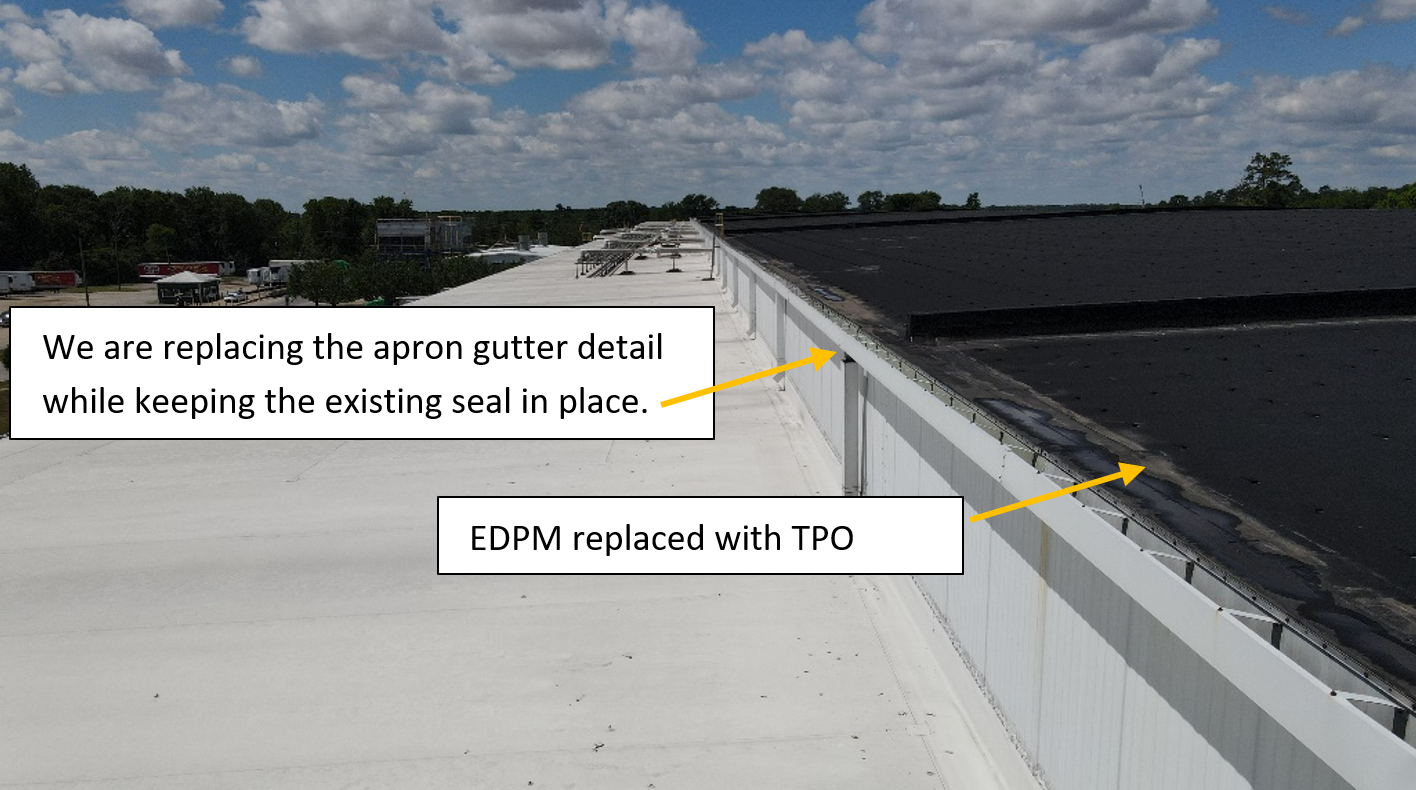
Cold Storage Roof Replacement
One of the most challenging details when replacing an existing working freezer is the perimeter detail where the roof meets an IMP (Insulated Metal Wall) Panel. There are two essential reasons why this can be tricky:
The freezer is rarely warmed up or emptied before roofing.
A roofing contractor can never know how the initial air seal was made during construction, ie. with a very tightly foamed ISO seal, a Vapor Barrier to the IMP with foam and ISO, or any other combination of VB and foam.
However, if the perimeter air seal is not breached, it is not necessary to know how the seal was made. It is necessary to ensure the new detail keeps the seal in place while still allowing for proper roof installation.
In the case discussed here, a mechanically attached EPDM over 7.8” of ISO insulation and a steel deck is being replaced.
We do not know how the deck, IMP wall and roof are sealed, but we do know that the seal is working properly. To make the required changes, we pulled off the EPDM stripping ply from the apron gutter flange, removed the gutter, and left the EPDM membrane intact.
Once we had the gutter removed without damaging the existing seal, we cut the EDPM membrane back 18” from the roof edge, and the detail below was installed:
Here is a breakdown of the detail:
A ½’ coverboard is mechanically attached to the steel deck through the existing 18” of EPDM to the nailers edge.
The new TPO membrane is brought over the edge and secured below the EPDM termination with a termination bar, butyl tape and caulk (we turn the termination bar upside down so the caulking receiver can be used.
The new apron gutter with 6” flange is attached to the nailers with two courses of 3/16th butyl tape between the flange and the TPO (support straps are attached from the outside of the gutter prior to hanging the gutter to keep the membrane from being punctured).
The new clad metal drip edge is also has two courses of butyl tape under it before attachment.
The TPO stripping ply is welded to the clad metal drip edge 2” passed the flange.
Once installed, the new seal and the old seal work together to keep air from being pulled through inside the freezer.
This option is often not available, as many times we care called in to tear open a bad perimeter seal and rebuild it from scratch. However, TeamCraft saved the customer money and interior disruption by using an innovative detail along approximately 2000’ linear feet of freezer.


